When photographing the coastline in San Francisco, one never knows what type of weather mother nature will bring. I planned another outing to the San Francisco coastline to capture the sunrise incorporating the seascape into the images. The tide was going to be relatively low so had hope to have an opportunity to used Seal Rocks as points of interest. As it often turns out, the weather wasn't going to cooperate to allow me to make the images I had planned on. Not to be deterred, I made the most of the situation and decided to make images showing how changing shutter speeds captures the movement of water in photographs. I have always enjoyed long exposures in the 3 plus minute mark so that was definitely I wanted to take. But I also wanted to make shots with varied shorter shutter speed lengths such as 30 seconds and lower. These shutter speeds will capture the water as something like brush strokes.
Below are some of the images made. Below each image is the length of exposure.
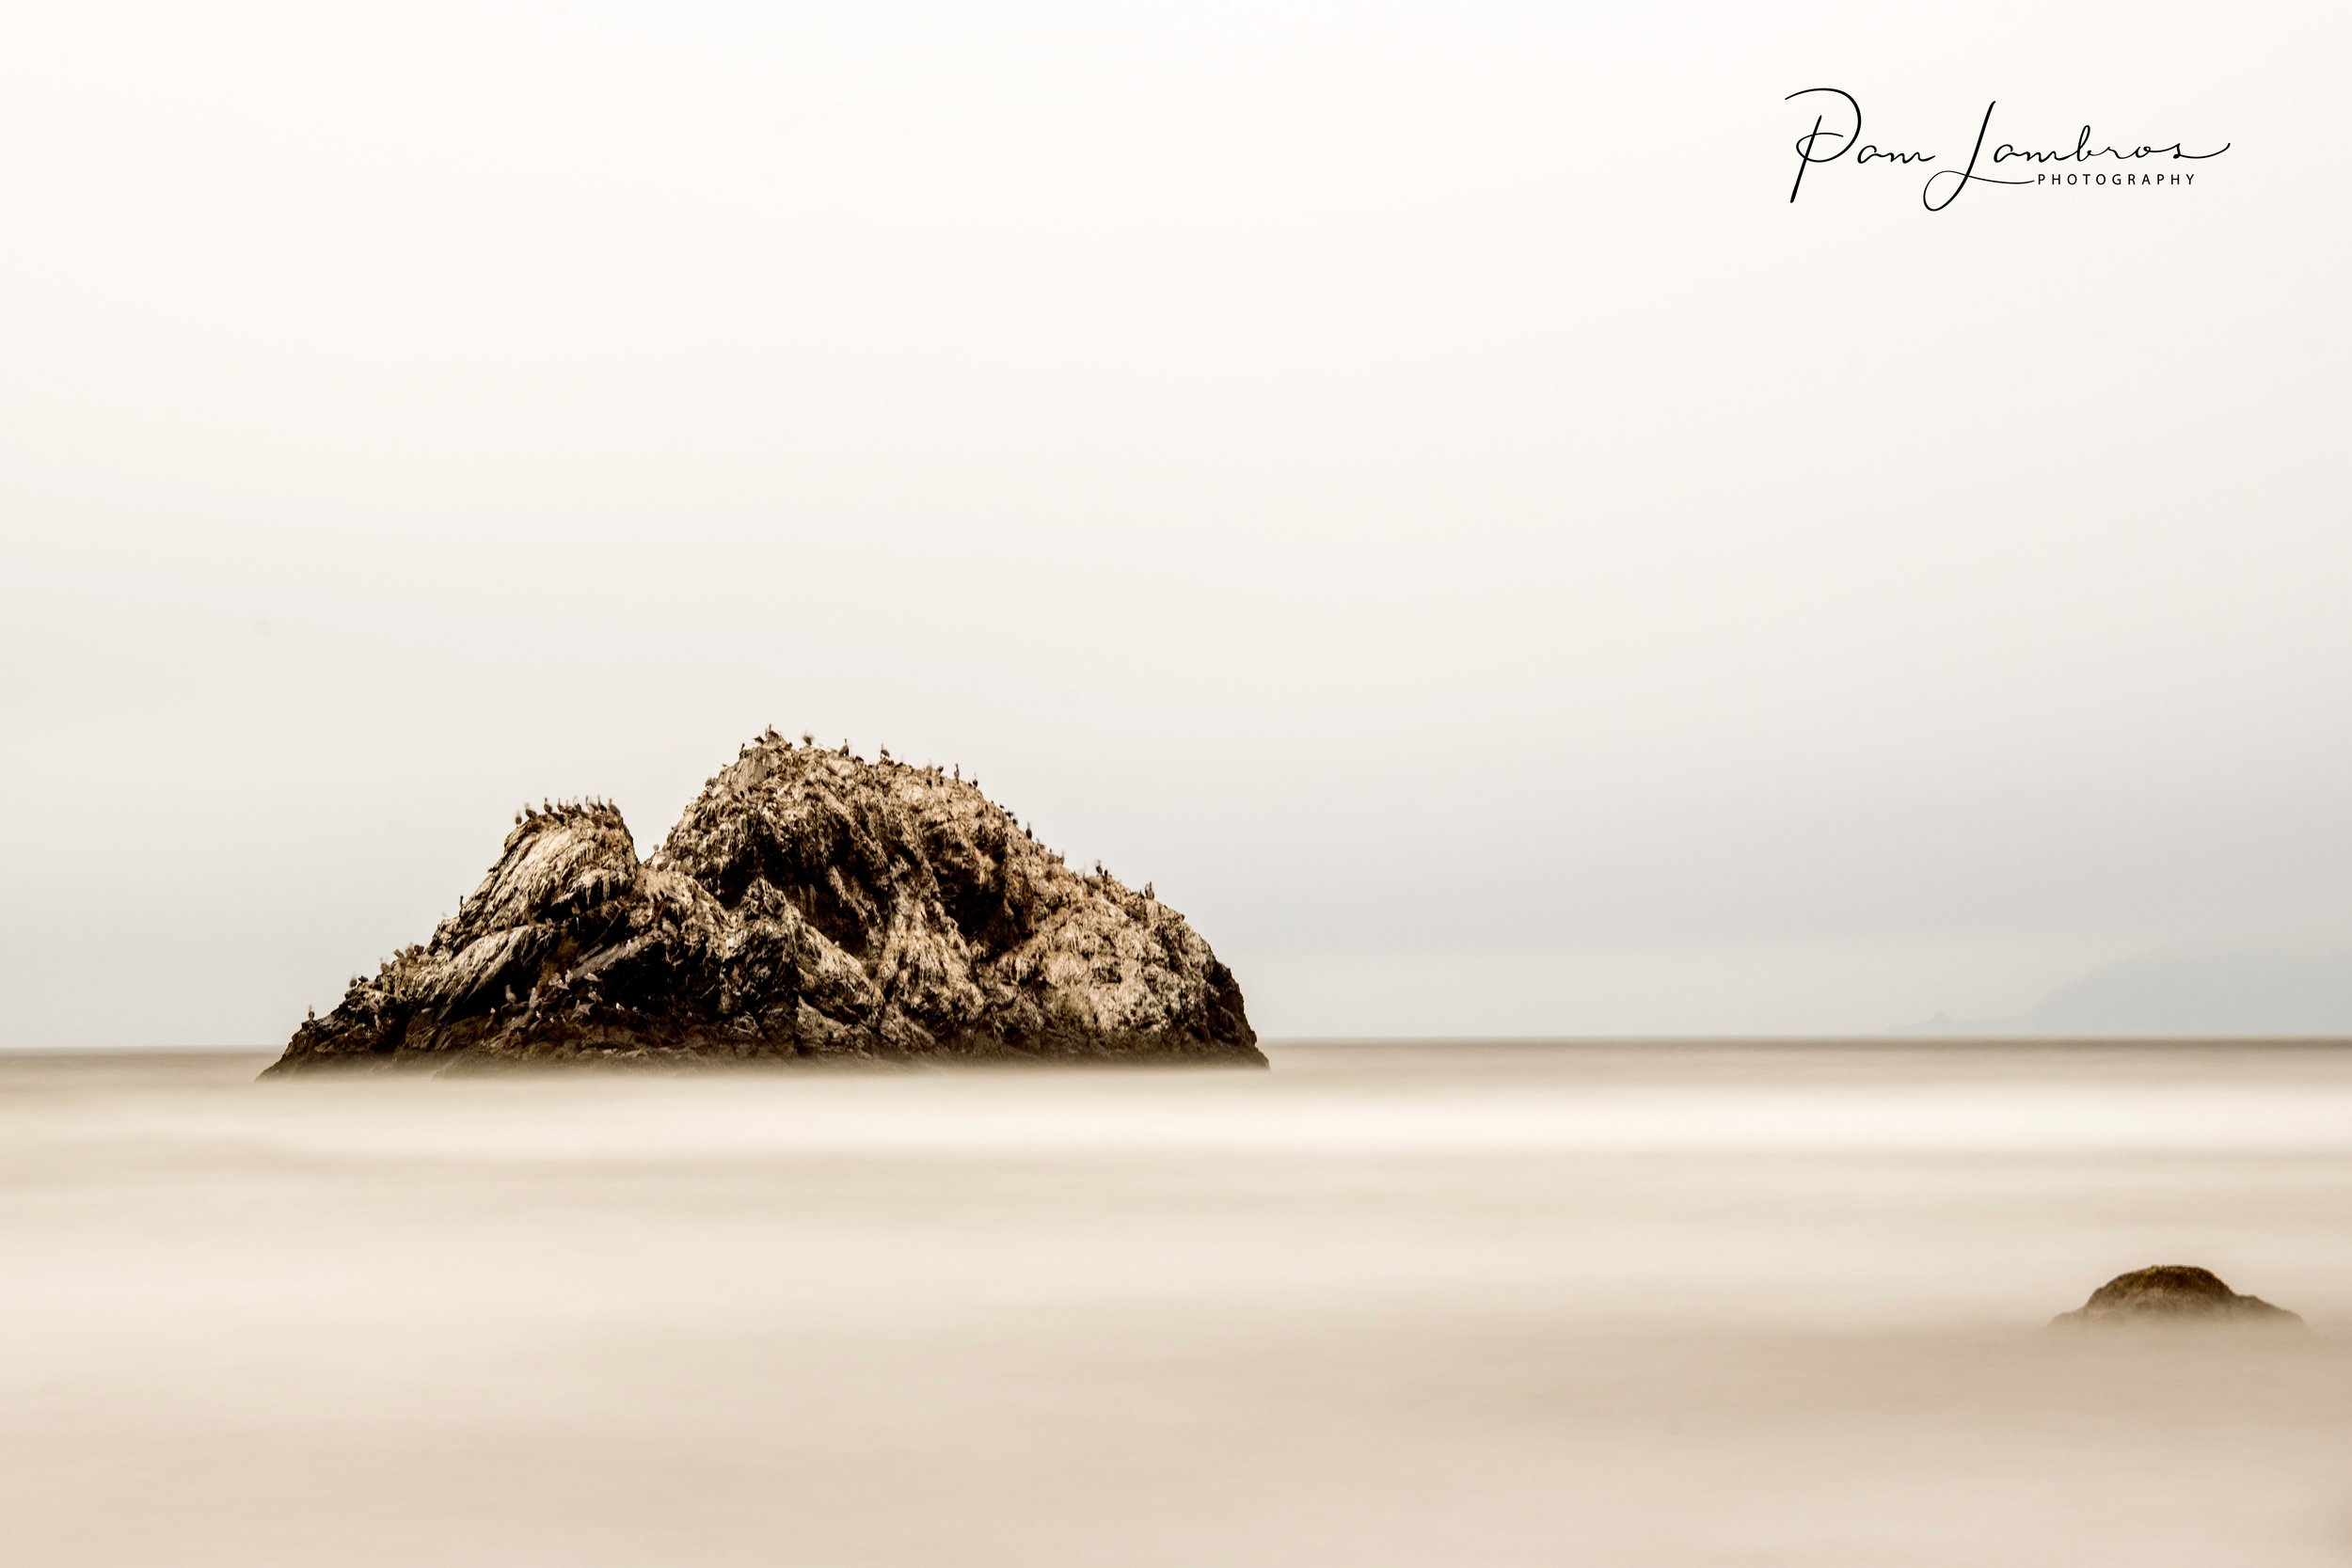
Seal Rock at San Francisco Ocean Beach. Exposure length of 3 minutes and 25 seconds.

Ocean Beach shoreline and incoming tide. Exposure length was 1/3 second. Notice the paint brush stroke impression.
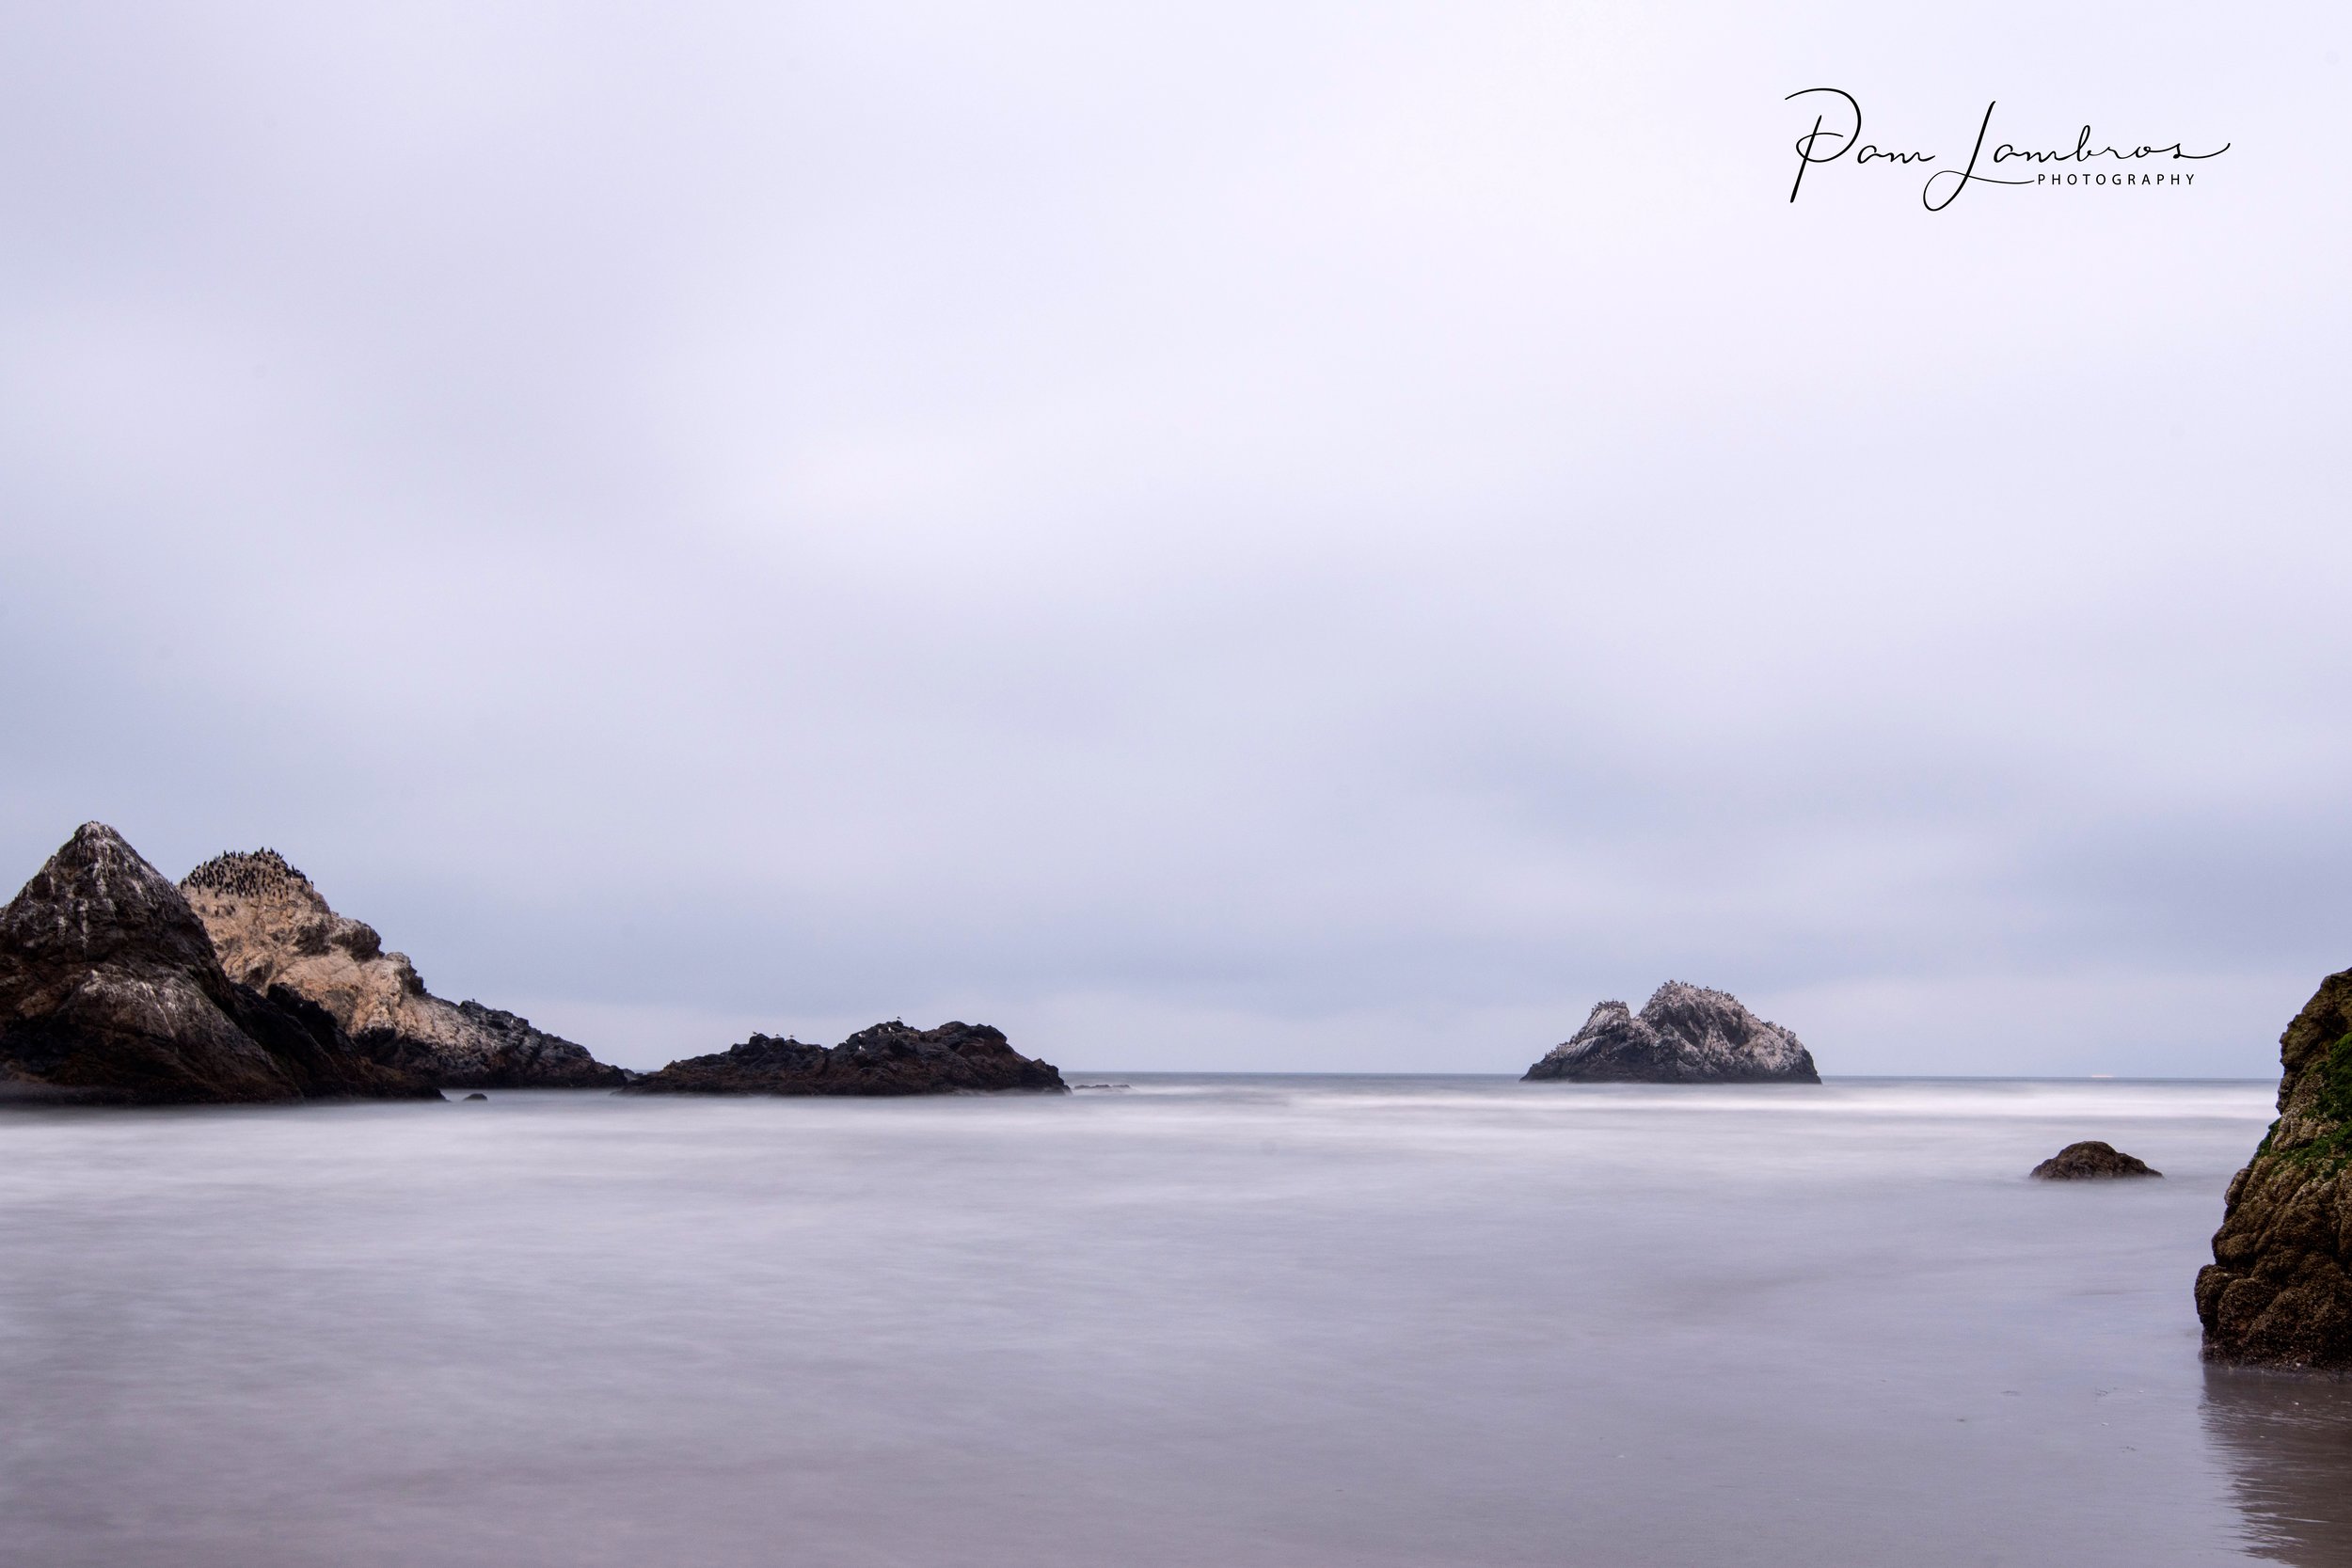
Seal Rocks at Ocean Beach San Francisco. Exposure length was 20 secs. Although the water appears much smoother, you can still see some wave action.

The exposure length for this image was 1.3 seconds. You can see the movement of the tide going back out.